IDA
As we mentioned, reverse engineering is all about analyzing programs and understanding what they do. But you may ask yourself: "How can I do that if I don't have the source code?" Here comes IDA, or any other disassembler.
What is a disassembler?
A disassembler is a program that takes a compiled program and converts it into assembly code. Then, some advanced disassemblers (like IDA) also try to convert the "not-so-readable" assembly code into pseudo-code (i.e., C code) to make it easier to understand.
We honestly recommend IDA over Ghidra or others because, even with the free version, it offers a more readable and complete pseudo-code. However, you should know the basics of Ghidra too, since sometimes you might be forced to use it because it works offline too.
Installation
In this section, we will provide a brief tutorial on how to install IDA.
First, visit https://hex-rays.com/ and create an account. Click on My Account and enter your email, then enter the code that they send you.
After that, you'll be presented with your dashboard; click on the Download center on the left menu. Now just select the version of IDA you want to download (e.g., directory 9.x/IDA Free) and click on the download icon for the program compatible with your OS (Linux, Mac, Windows).
You should see something like this:
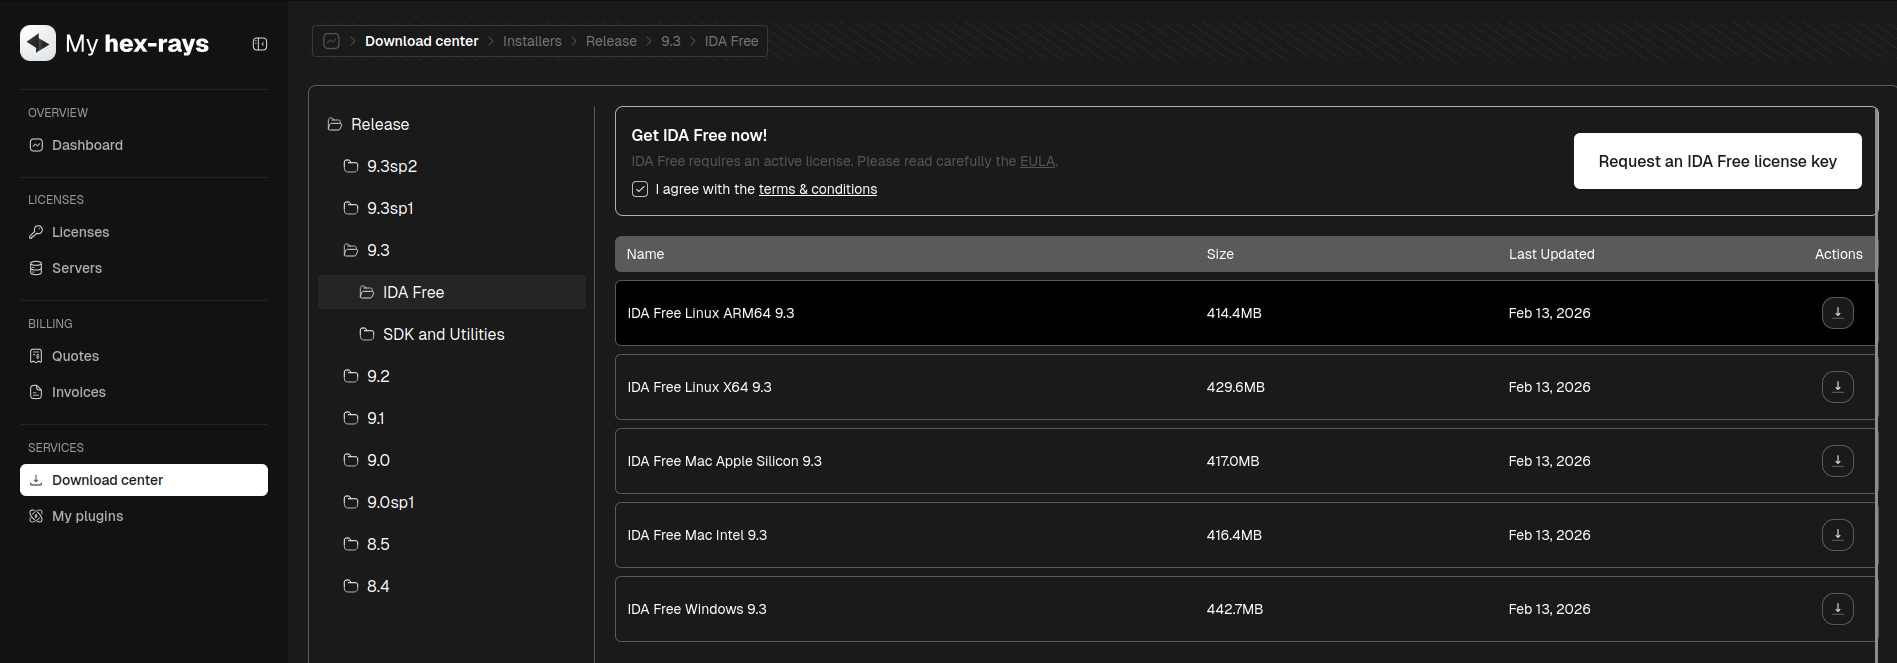
While in that same section, click on the Request an IDA free license key button and then go in the License section to download your free license key for IDA. We suggest putting the license key somewhere safe (at least where you won't delete it accidentally).
After you download IDA and the license key, simply run the IDA installer and then open IDA itself. When you're prompted to enter a license, just fill in the field with your license path.
Basics
After you open IDA, you'll have to select a compiled program to decompile. You can just hit enter on the pop-ups that IDA shows to get to the actual decompiled version.
You should see something like this:
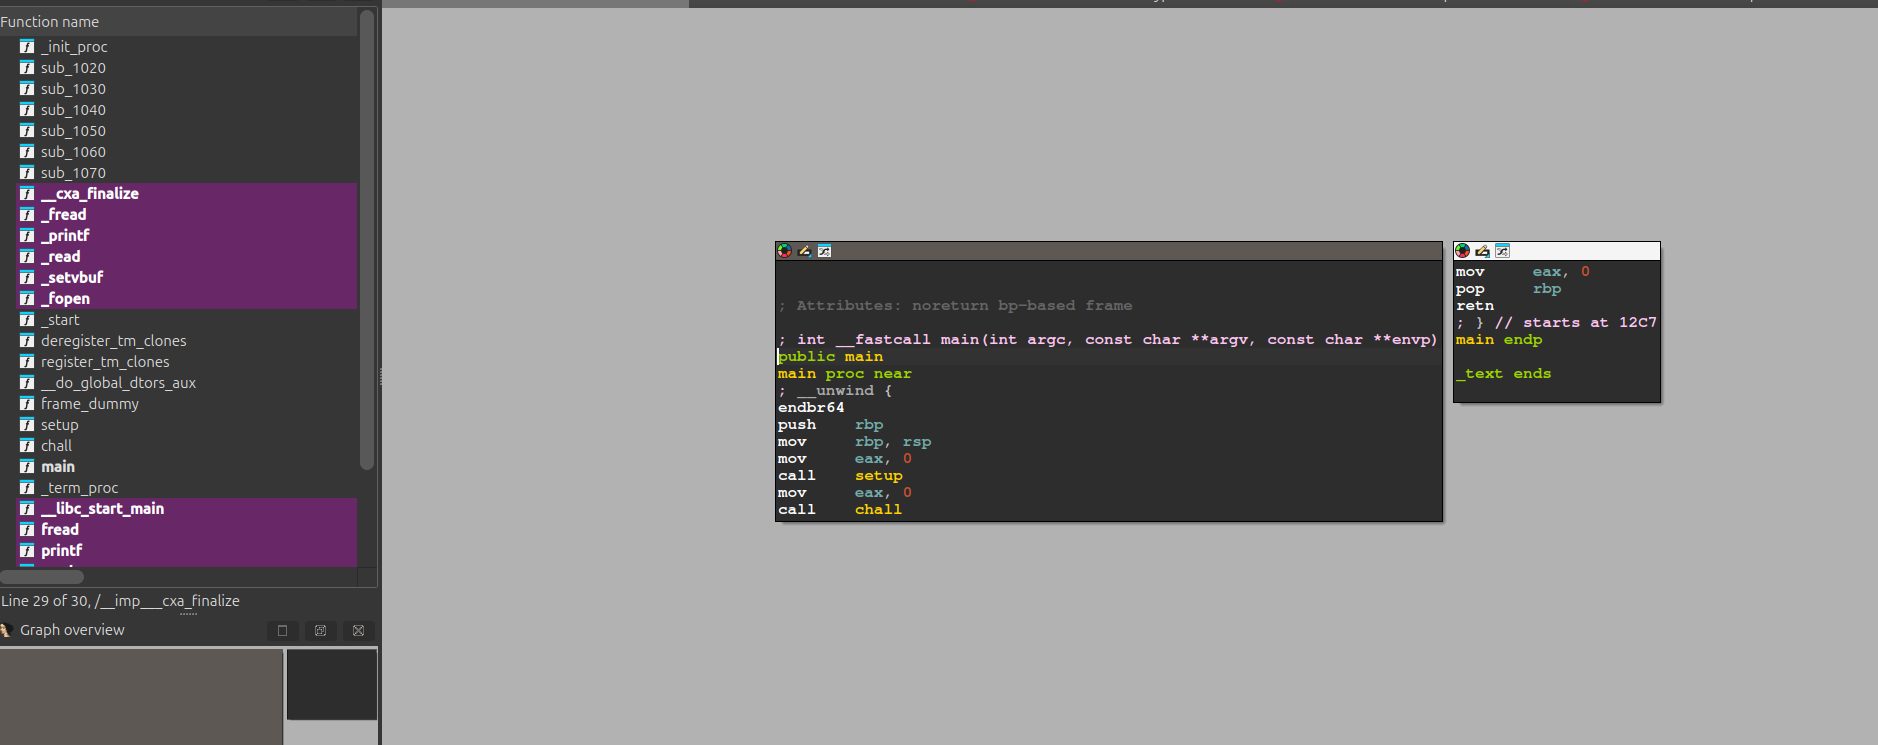
On the left, you'll see all the functions that the program has.
Clicking on them will send you to the function page that should look similar to the one that you were in before.
Usually we choose to start from main because that will then lead to all the other functions used.
Now you can choose between doing two things:
Tab → to see the pseudo-code,
Space → to see the assembly code.
Obviously, the pseudo-code is easier to read, but it's not always 100% accurate. As you go on, you'll learn when you actually need to read the detailed assembly rather than the code.
Here's something similar to what you should see after you click on main and then Tab:
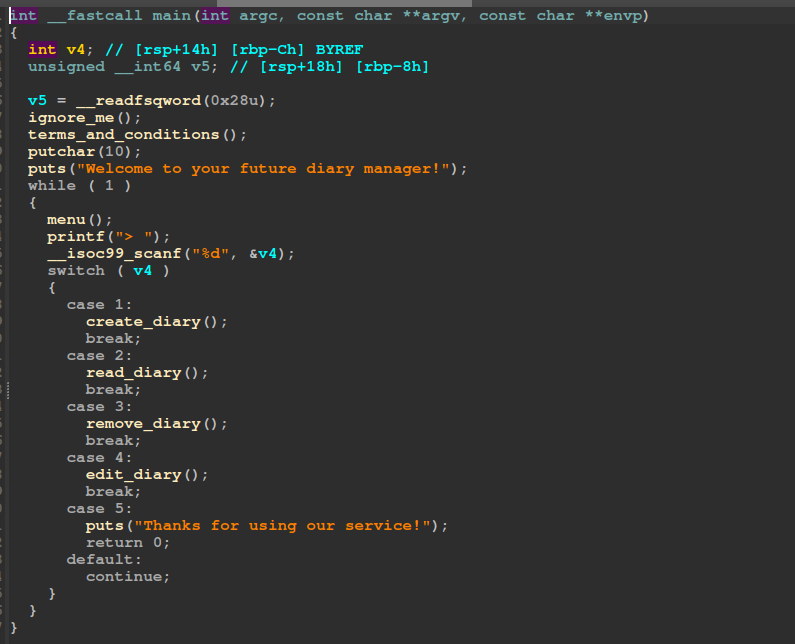
Now you can follow the flow of the program by clicking each function that is called and try to understand what it does.